Article sections
[Vigor3900] How to make the LAN clients be protected by OpenDNS FamilyShield service?
OpenDNS provides the free Family Shield service that helps screen out potentially objectionable content that you may prefer not to see or don’t want others in your family to stumble across. To use the service, we just need to use Open DNS IP 208.67.222.123 and 208.67.220.123 as the DNS server IP! The example below will show how to configure Vigor Router to use the OpenDNS IP as DNS server and block specific LAN clients from using other DNS servers, thus to make them be protected by the Family Shield service.
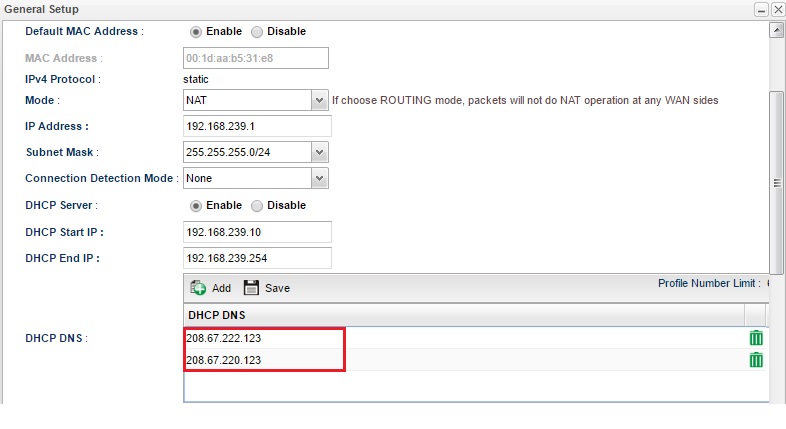
1. Assign OpenDNS server IP to LAN DHCP Clients: Go to LAN >> General Setup, and click on the LAN profile in use.
- Click Add in DHCP DNS
- Enter IP 208.67.222.123 and 208.67.220.123, and click Save
- Click Apply to save the changes
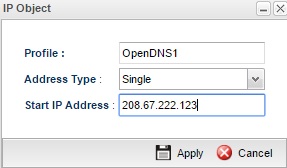
2. Create IP objects for Open DNS server IP. Go to Objects Setting >> IP Object, and click Add to create a new profile.
- Enter Profile name
- Select Single for Address Type
- Enter 208.67.222.123 for Start IP Address
- Click Apply to save the changes
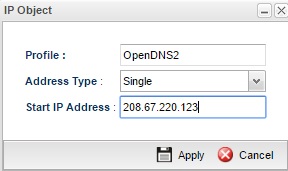
3. Similarly, create another IP object for another Open DNS server IP. Go to Objects Setting >> IP Object, and click Add to create a new profile.
- Enter Profile name
- Select Single for Address Type
- Enter 208.67.220.123 for Start IP Address
- Click Apply to save the changes
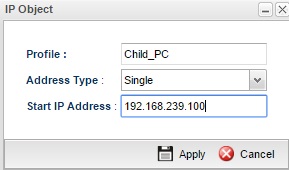
4. Create IP object for the LAN PC’s IP that you would like to protect. Go to Objects Setting >> IP Object, and click Add to create a new profile.
- Enter Profile name
- Select Single for Address Type
- For Start IP Address, enter the IP of the LAN PC you’d like to protect
- Click Apply to save the changes
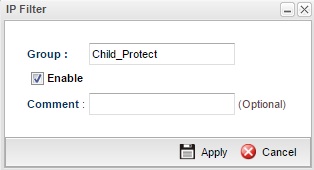
5. Go to Firewall >> IP Filter, and click Add to create a IP Filter Group profile.
- Enter Group profile name
- Check Enable
- Click Apply to save the changes
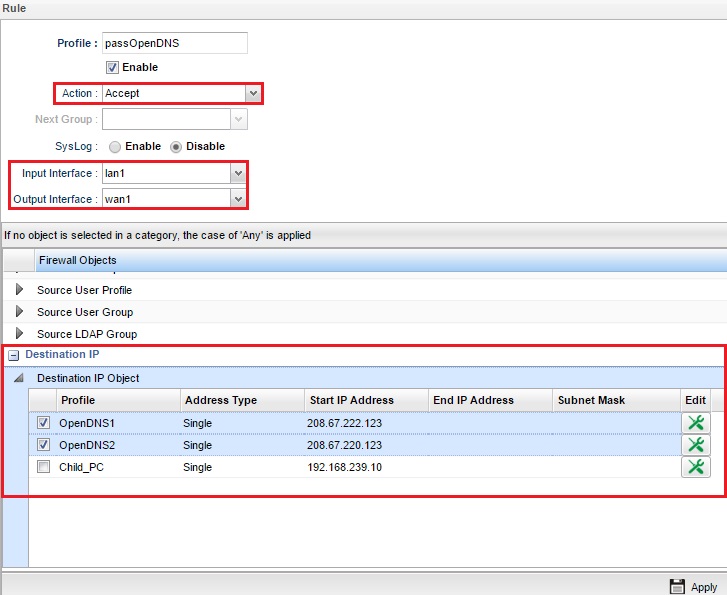
6. Create a Firewall IP Filter rule to pass all packets to OpenDNS server IP address. Go to Firewall >> IP Filter >> Child_Protect, and click Add to create an IP Filter rule.
- Enter rule profile name
- Check Enable
- Select Accept for Action
- Select the LAN profile in use for Input Interface
- Select he WAN profile in use for the Output Interface
- In Destination IP area, select the OpenDNS objects we just created
- Click Apply to save the changes
7 Create another Firewall IP Filter rule to block the DNS packets from Child PC’s IP address to any other IP address. Go to Firewall >> IP Filter >> Child_Protect, and click Add to create an IP Filter rule.
- Enter rule profile name
- Check Enable
- Select Block for Action
- Select the LAN profile in use for the Input Interface
- Select the LAN profile in use for the Output Interface
- In Service Protocol area, select DNS for Service Type Object
- In Source IP area, select the IP Object Child_PC we created
- Click Apply to save the changes

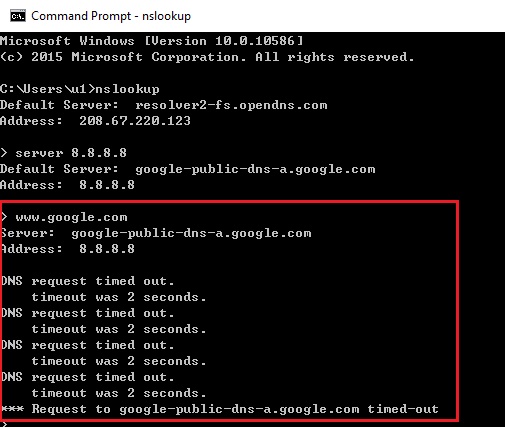
8. After completing the above configurations, Child’s PC won’t be able to query other DNS server about domain names, they can only use the OpenDNS FamilySheild server.
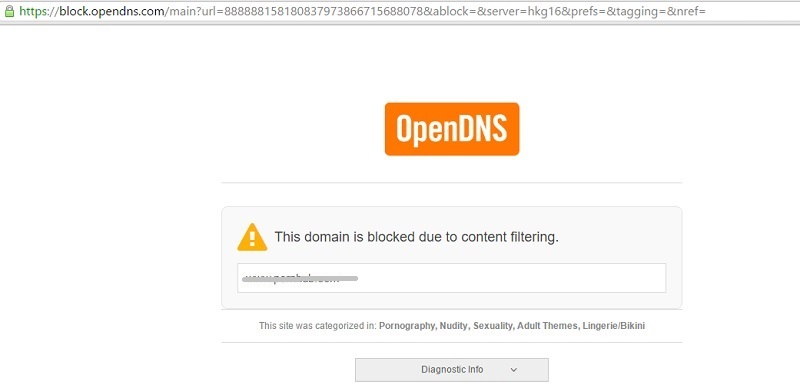
9. While the child tries to browse a website that contains content improper for children, it will be blocked by OpenDNS Family Shield service.