
Article sections
DrayOS supports generating Let’s Encrypt certificate function since firmware version 3.9.0. As we know, the certificate signed up by Let’s Encrypt is a valid certificate so using Let’s Encrypt certificate on Vigor Router can simplify the VPN configuration for different VPN clients, especially while using IKEv2 VPN with EAP authentication VPN. This article demonstrates how to set up Vigor Router as an IKEv2 VPN server by using the Let’s Encrypt certificate, and how to establish a connection from iOS.
Set Up Vigor Router
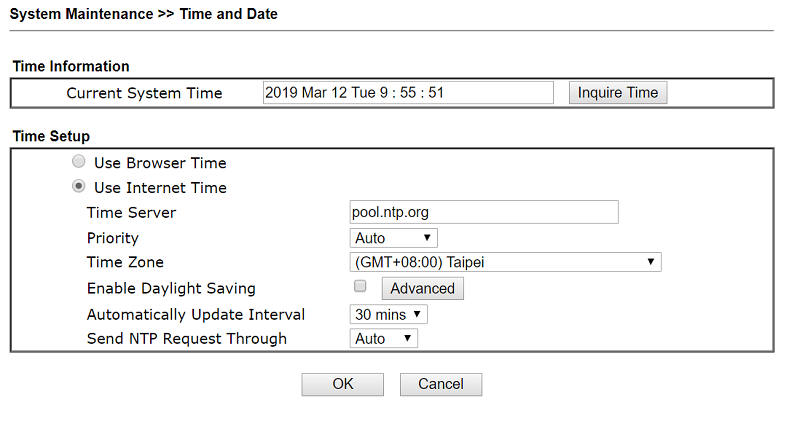
1. Select the correct Time Zone and ensure the router system time is correct.
2. Activate the DrayDDNS service on your Vigor Router by referring to the article here.
3. Apply the Let’s Encrypt certificate for your DrayDDNS domain name by referring to the article here.
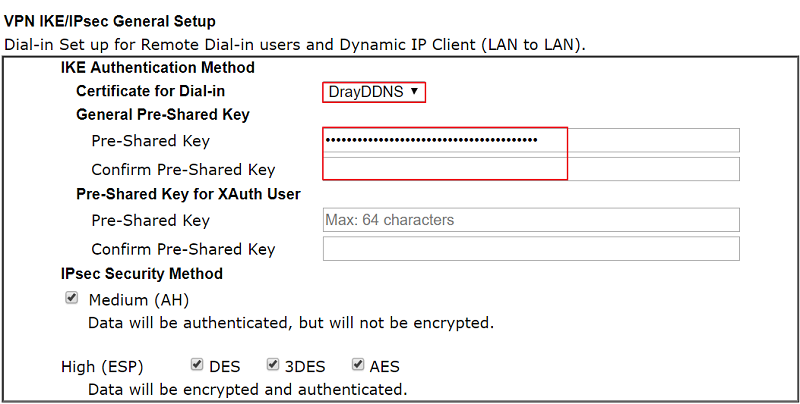
4. Go to VPN and Remote Access >> IPsec General Setup page, select DrayDDNS – the Domain which used for applying Let’s Encrypt certificate as Certificate for Dial-in and enter the General IPsec Pre-shared Key.
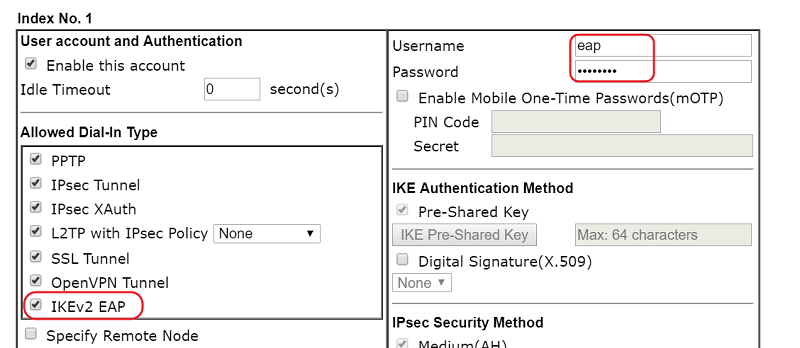
5. Go to VPN and Remote Access >> Remote Dial-in User page, click an available index. Edit the profile as follows:
- Enable the account and enable IKEv2 EAP.
- Give Username and Password.
- Click OK to save
Connecting from Windows 10
Windows 10 requires to verify the whole certificate chain of the VPN server but Vigor Router has an issue in sending the intermediate certificate out with the current firmware version 3.9.0, so we need to download and install the intermediate certificate manually as the temporary solution. In the future firmware version, we may skip steps 1 to 5.
1. Download Let’s Encrypt X3 certificate by either of the ways below:
a. Download the Let’s Encrypt Authority X3 (IdenTrust cross-signed) via https://letsencrypt.org/certificates/
and save the file as .pem or .crt file on the computer.
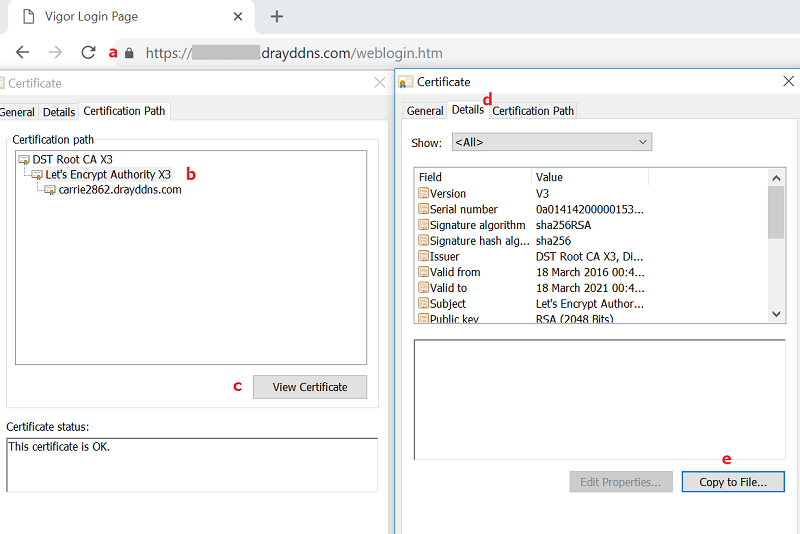
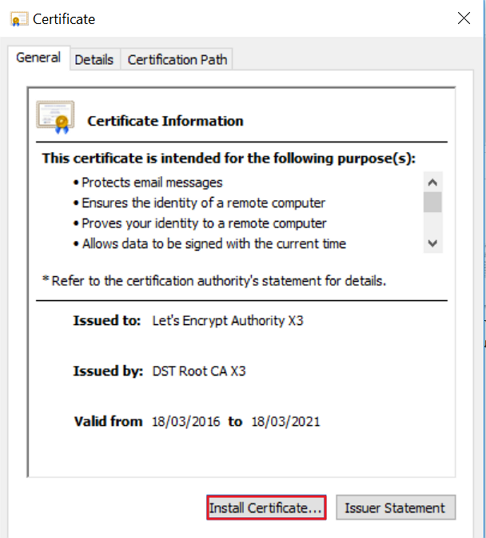
b. Browse your Vigor Router by https and export the Let’s Encrypt Authority X3 certificate by viewing the certificate details and copy to file.
2. Double click the downloaded certificate file and install the certificate.
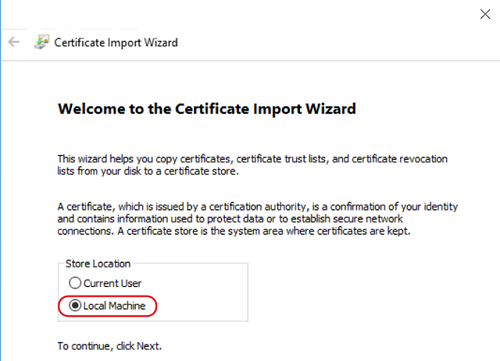
3. Follow the Certificate Import Wizard to import the certificate. First, select Local Machine and click Next.
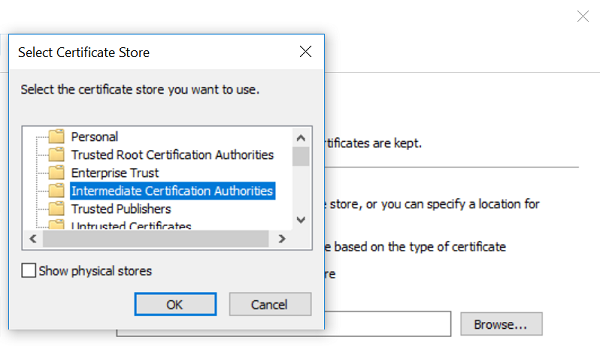
4. Select Intermediate Certification Authorities as the certificate store and click OK.
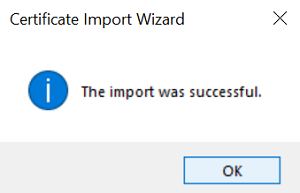
5. The import was successful.
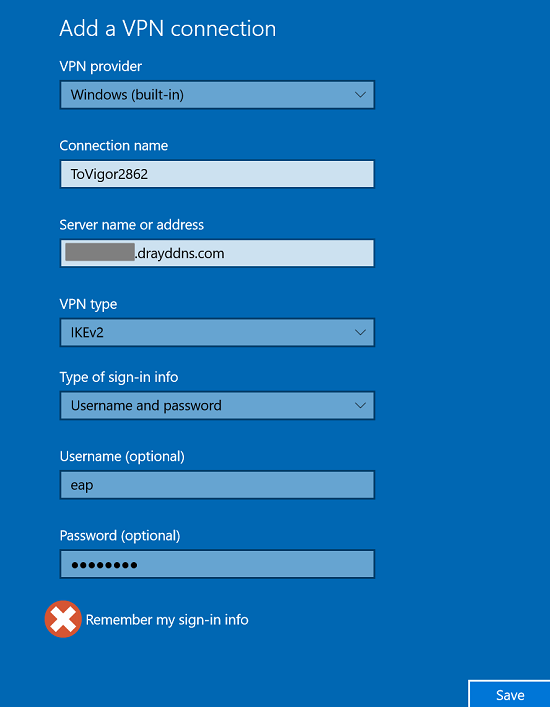
6. Go to Network and Internet Settings >> VPN, and click Add a VPN connection
-
- Select Window (built-in) for VPN provider
- Enter the domain of router for Server name or address
- Select IKEv2 as VPN type
- Enter User name and Password
- Deselect remember my sign-in info
- Click Save
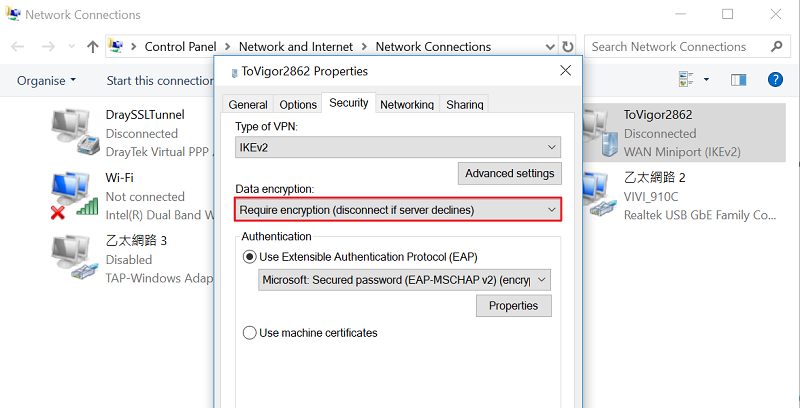
7. Go to Network and Sharing Centre >> Change adapter settings.Select the VPN profile we just created, click the mouse on the right side and choose Properties. In the Security tab, select Require Encryption if Server declines for Data Encryption and click OK to save the changes.
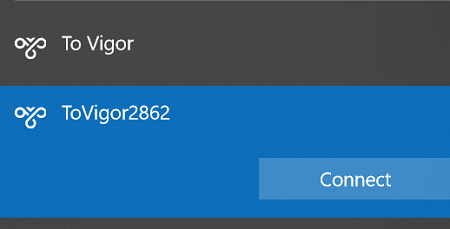
8. Double click the VPN profile and click Connect to establish the VPN connection.
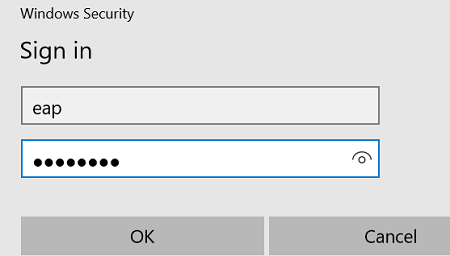
9.Windows will pop-up the Authentication window and we need to enter the password two times for creating the VPN connection successfully.
10. Then we can see the VPN is connected successfully.