
Article sections
Ce document explique la méthode de configuration d’un routeur Vigor en tant que passerelle VPN SSL permettant l’accès de clients internet, en particulier Windows, d’accéder au réseau local avec un tunnel VPN SSL. Nous allons démontrer la configuration nécessaire pour le routeur ansi que la procédure pour démarrer le VPN SSL depuis un PC utilisant le client Smart VPN, le client gratuit fourni par DrayTek.
1. Make sure the router is connected to the Internet and has a public WAN IP address so that VPN clients on the Internet can reach it.
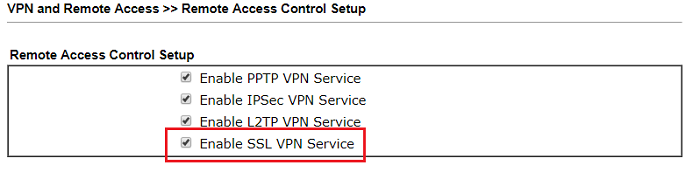
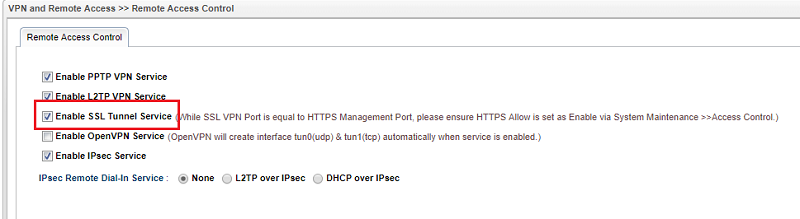
2. At VPN and Remote Access >> Remote Access Control, make sure « SSL VPN Service » is enabled.
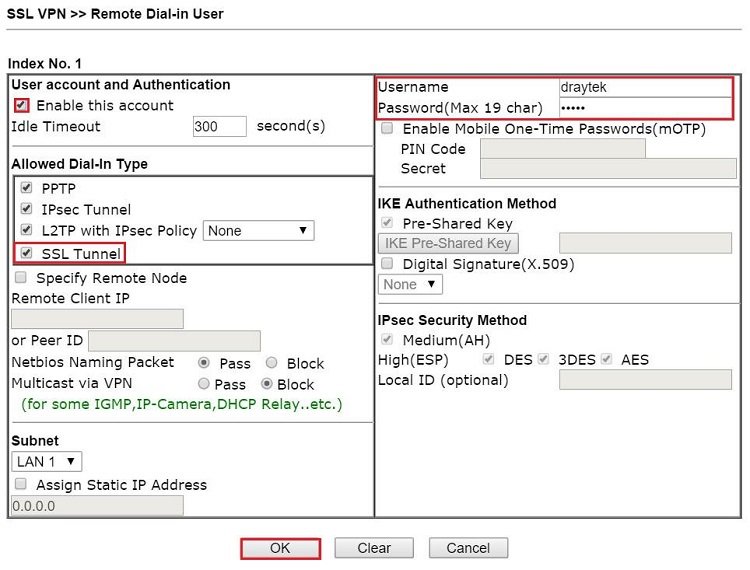
3. Create user profiles for SSL VPN clients. Go to VPN and Remote Access >> Remote Dial-in User. add a profile as follows:
- Check « SSL Tunnel » for Allowed Dial-In Type.
- Enter Username and Password.
- Click OK to save the profile.
SSL VPN Setup on Windows
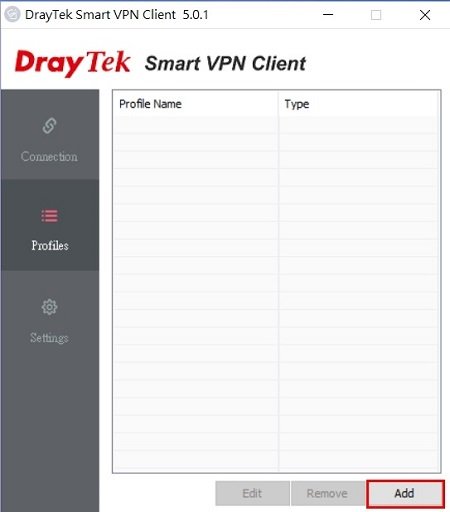
1. Launch Smart VPN Client, click Add to create a new VPN profile.
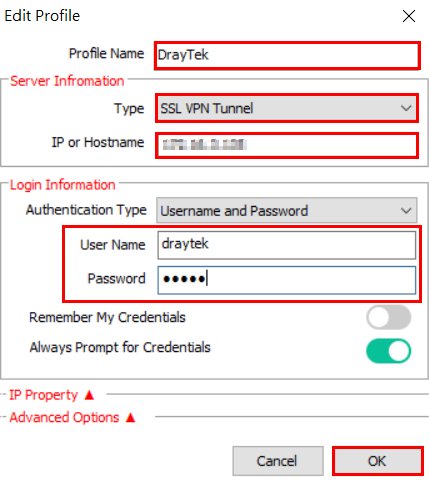
2. Configure the VPN Profile as follows:
- Enter Profile Name
- Select « SSL VPN Tunnel » in Type
- Enter Vigor Router’s WAN IP in IP or Hostname
- Enter User Name and Password
- Click OK
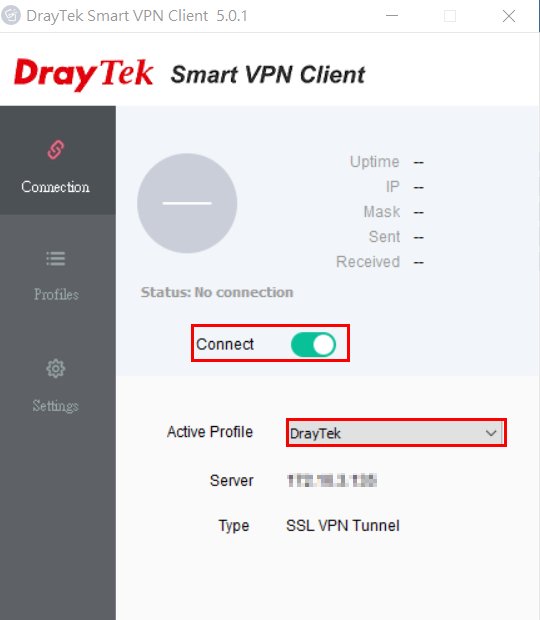
3. Initiate the VPN by selecting the VPN Profile and swift to Connect.
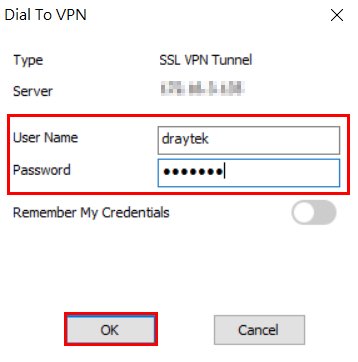
4. Confirm User Name and Password, and click OK to start the SSL VPN connection to Vigor Router.
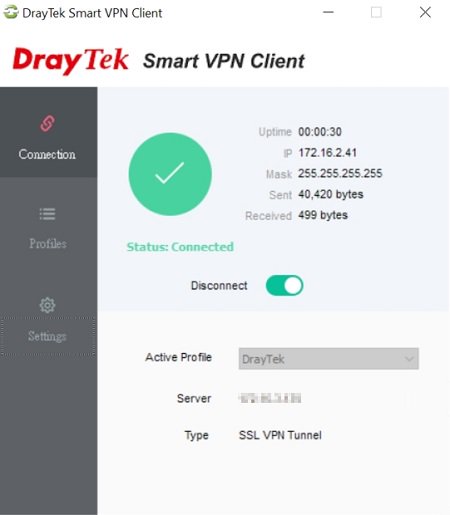
5. The status will show « connected » once the connection established.
1. Make sure the router is connected to the Internet and has a public WAN IP address so that VPN clients on the Internet can reach it.
2. At VPN and Remote Access >> Remote Access Control, make sure « SSL VPN Service » is enabled.
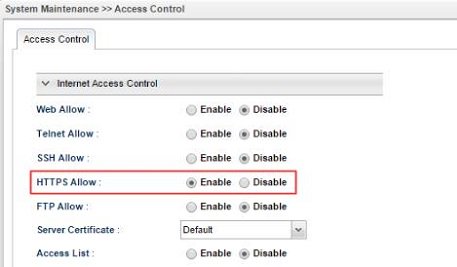
3. If SSL VPN port and HTTPS port are the same, make sure HTTPS Allow is enabled at System Maintenance >> Access Control.
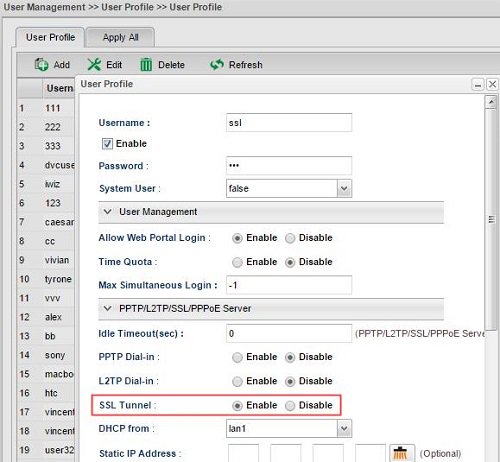
4. Create user profiles for SSL VPN clients. Go to User Management >> User Profile, and click Add.
- Check Enable
- Type Username and Password
- At PPTP/L2TP SSL Server, select « Enable » for SSL Tunnel
- Click Apply to save the profile.
SSL VPN Setup on Windows
1. Launch Smart VPN Client, click Add to create a new VPN profile.
2. Configure the VPN Profile as follows:
- Enter Profile Name
- Select « SSL VPN Tunnel » in Type
- Enter Vigor Router’s WAN IP in IP or Hostname
- Enter User Name and Password
- Click OK
3. Initiate the VPN by selecting the VPN Profile and swift to Connect.
4. Confirm User Name and Password, and click OK to start the SSL VPN connection to Vigor Router.
5. The status will show « connected » once the connection established.