Article sections
Vigor Router supports three classes for QoS. For the traffic that does not belong to any of them will be categorized as « Other. » To configure QoS on Vigor routers, take the following steps.
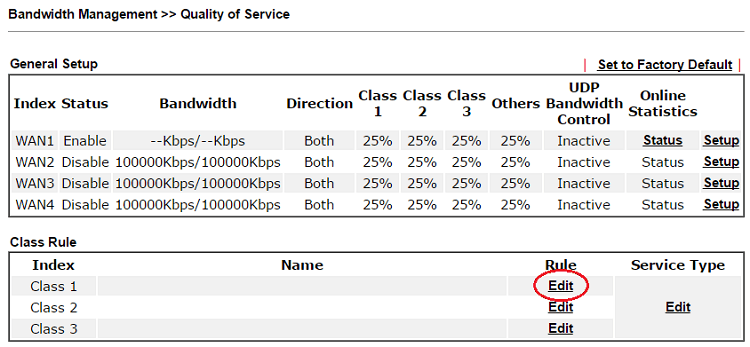
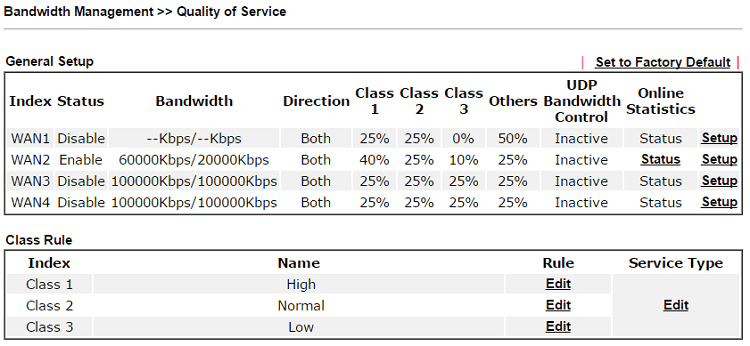
1. Edit Class Rule: Go to Bandwidth Management >> Quality of Service, click Edit on the Class you would like to configure.
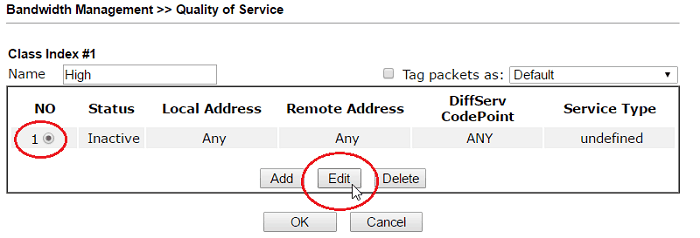
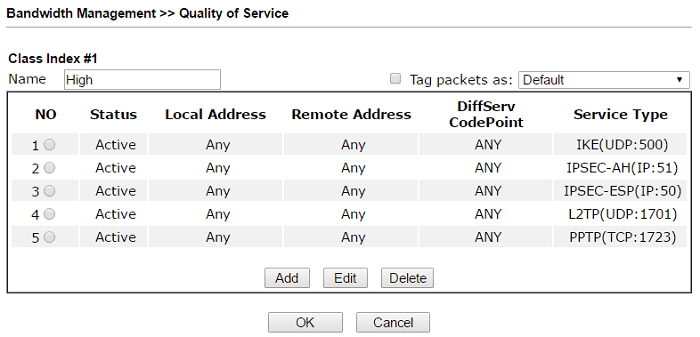
2. Give this Class a name, select a rule index, and click Edit.
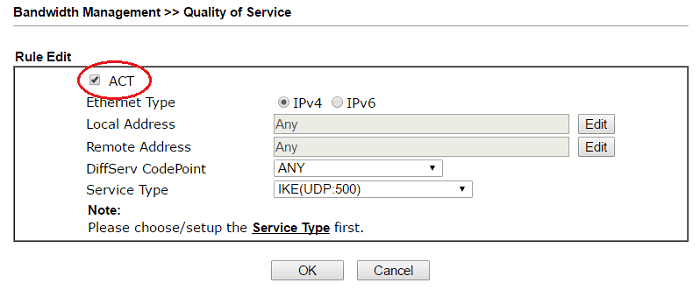
3. Check ACT to enable this rule, specify the IP address or service type of the traffic you’d like to classify into Class 1.
4. Click Add to add more rules for this Class. Click OK to finish.
5. Similarly, specify the types of traffic that should classify into in the other two classes.
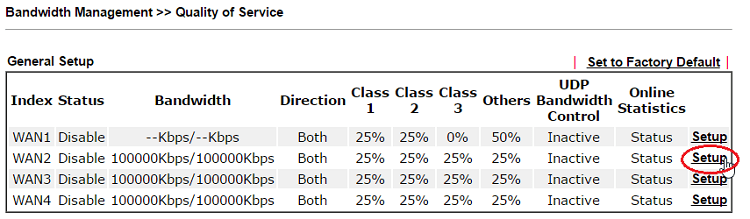
6. Next, on the same page, click Setup on the WAN index that you would like to set up QoS.
7. In the setup page,
- Check Enable the QoS Control,
- enter the WAN interface’s actual bandwidth for Inbound and Outbound Bandwidth, (DSL WAN’s bandwidth will be detected by the router automatically. If you don’t know the actual bandwidth, you may use online speed test page such as http://www.speedtest.net)
- enter the Reserved Bandwidth Ratio for each Class,
- Click OK to save.

NOTE:
- Enable UDP Bandwidth Control is for preventing P2P/BT services occupying the bandwidth.
- Outbound TCP ACK Prioritize to make sure TCP connections respond ACK first so it can get the next packet. Because when the peer did not receive an ACK, TCP reduces the offered load by half to avoid congestion.
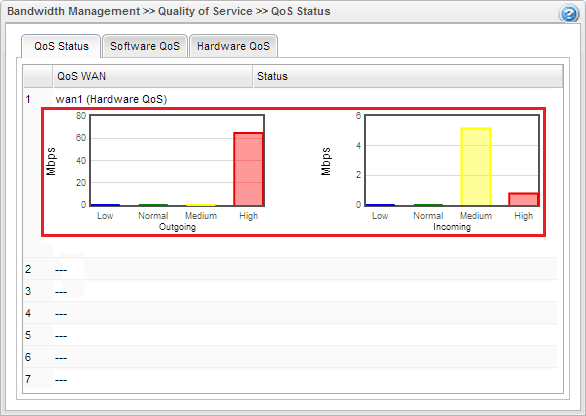
8. Now the QoS settings are complete. Network Administrator may click Status to check the bandwidth usage of each Class.

Vigor3900 support Hardware QoS for one WAN, its performance is better than software QoS; therefore, we strongly recommend to use the Hardware QoS first.
The example below will show how to configure Vigor3900 QoS for the scenario below. Please notice that the weight is not in percentage, the router will regulate the traffic by the proportion of each class.
| Class | High | Medium | Normal | Low |
| Usage | FTP server | HTTP Server | Default (for all) | Un-defined |
| Weight | 40 | 30 | 20 | 10 |
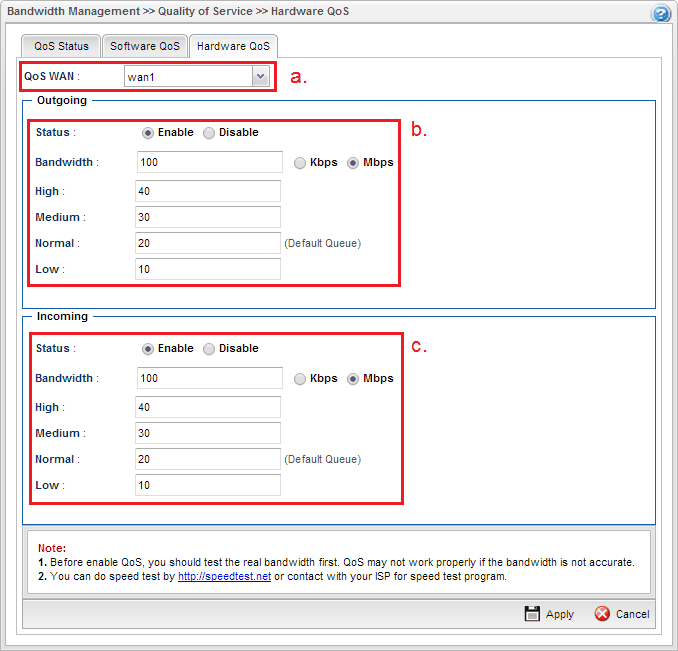
1. Go to Bandwidth Management >> Quality of Service >> Hardware QoS to set up the QoS configuration:
- Select the WAN interface.
- Enable Outgoing QoS, set the Outgoing Bandwidth and its Queue weight.
- Enable Incoming QoS, set the Incoming Bandwidth and its Queue weight.(It is suggested to input the real line speed for Bandwidth. If you don’t know the actual Internet speed, perform a speed test it by websites like http://www.speedtest.net/.)
- Click Apply to save.
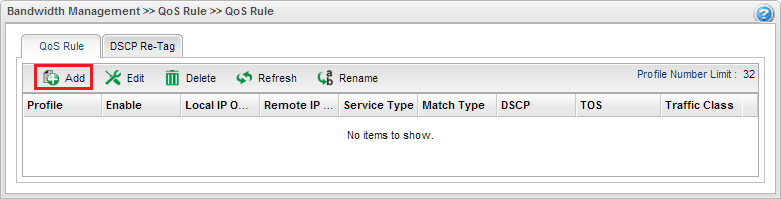
2. Go to the Bandwidth Management >> QoS Rule, and click Add to set up the rule profile.
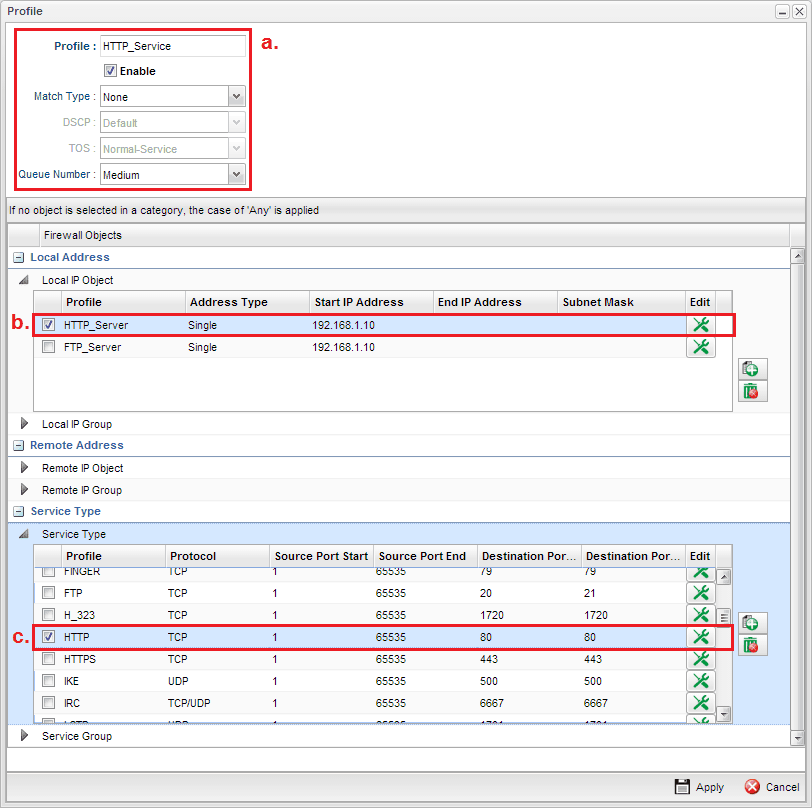
3. Configure the QoS rule for HTTP Server:
- Enter a Profile name, check Enable, and set Queue Number to Medium.
- Select the IP object of the HTTP Server in Local Address.
- Select the Service Type object of HTTP Server at Service Type.
(Note: To create customized service types, go to Object Setting >> Service Type Object)
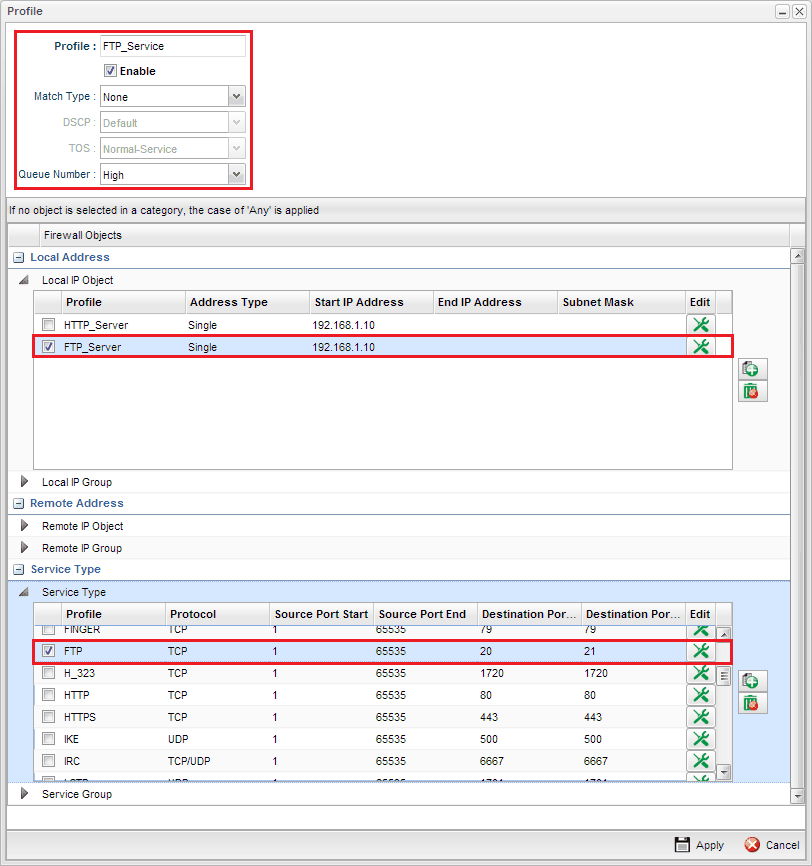
4. Repeat step 3 to set the QoS rule for FTP Server.
5. After finishing the settings, go to Bandwidth Management >> Quality of Service >> Hardware QoS to check if the QoS rule is working.